
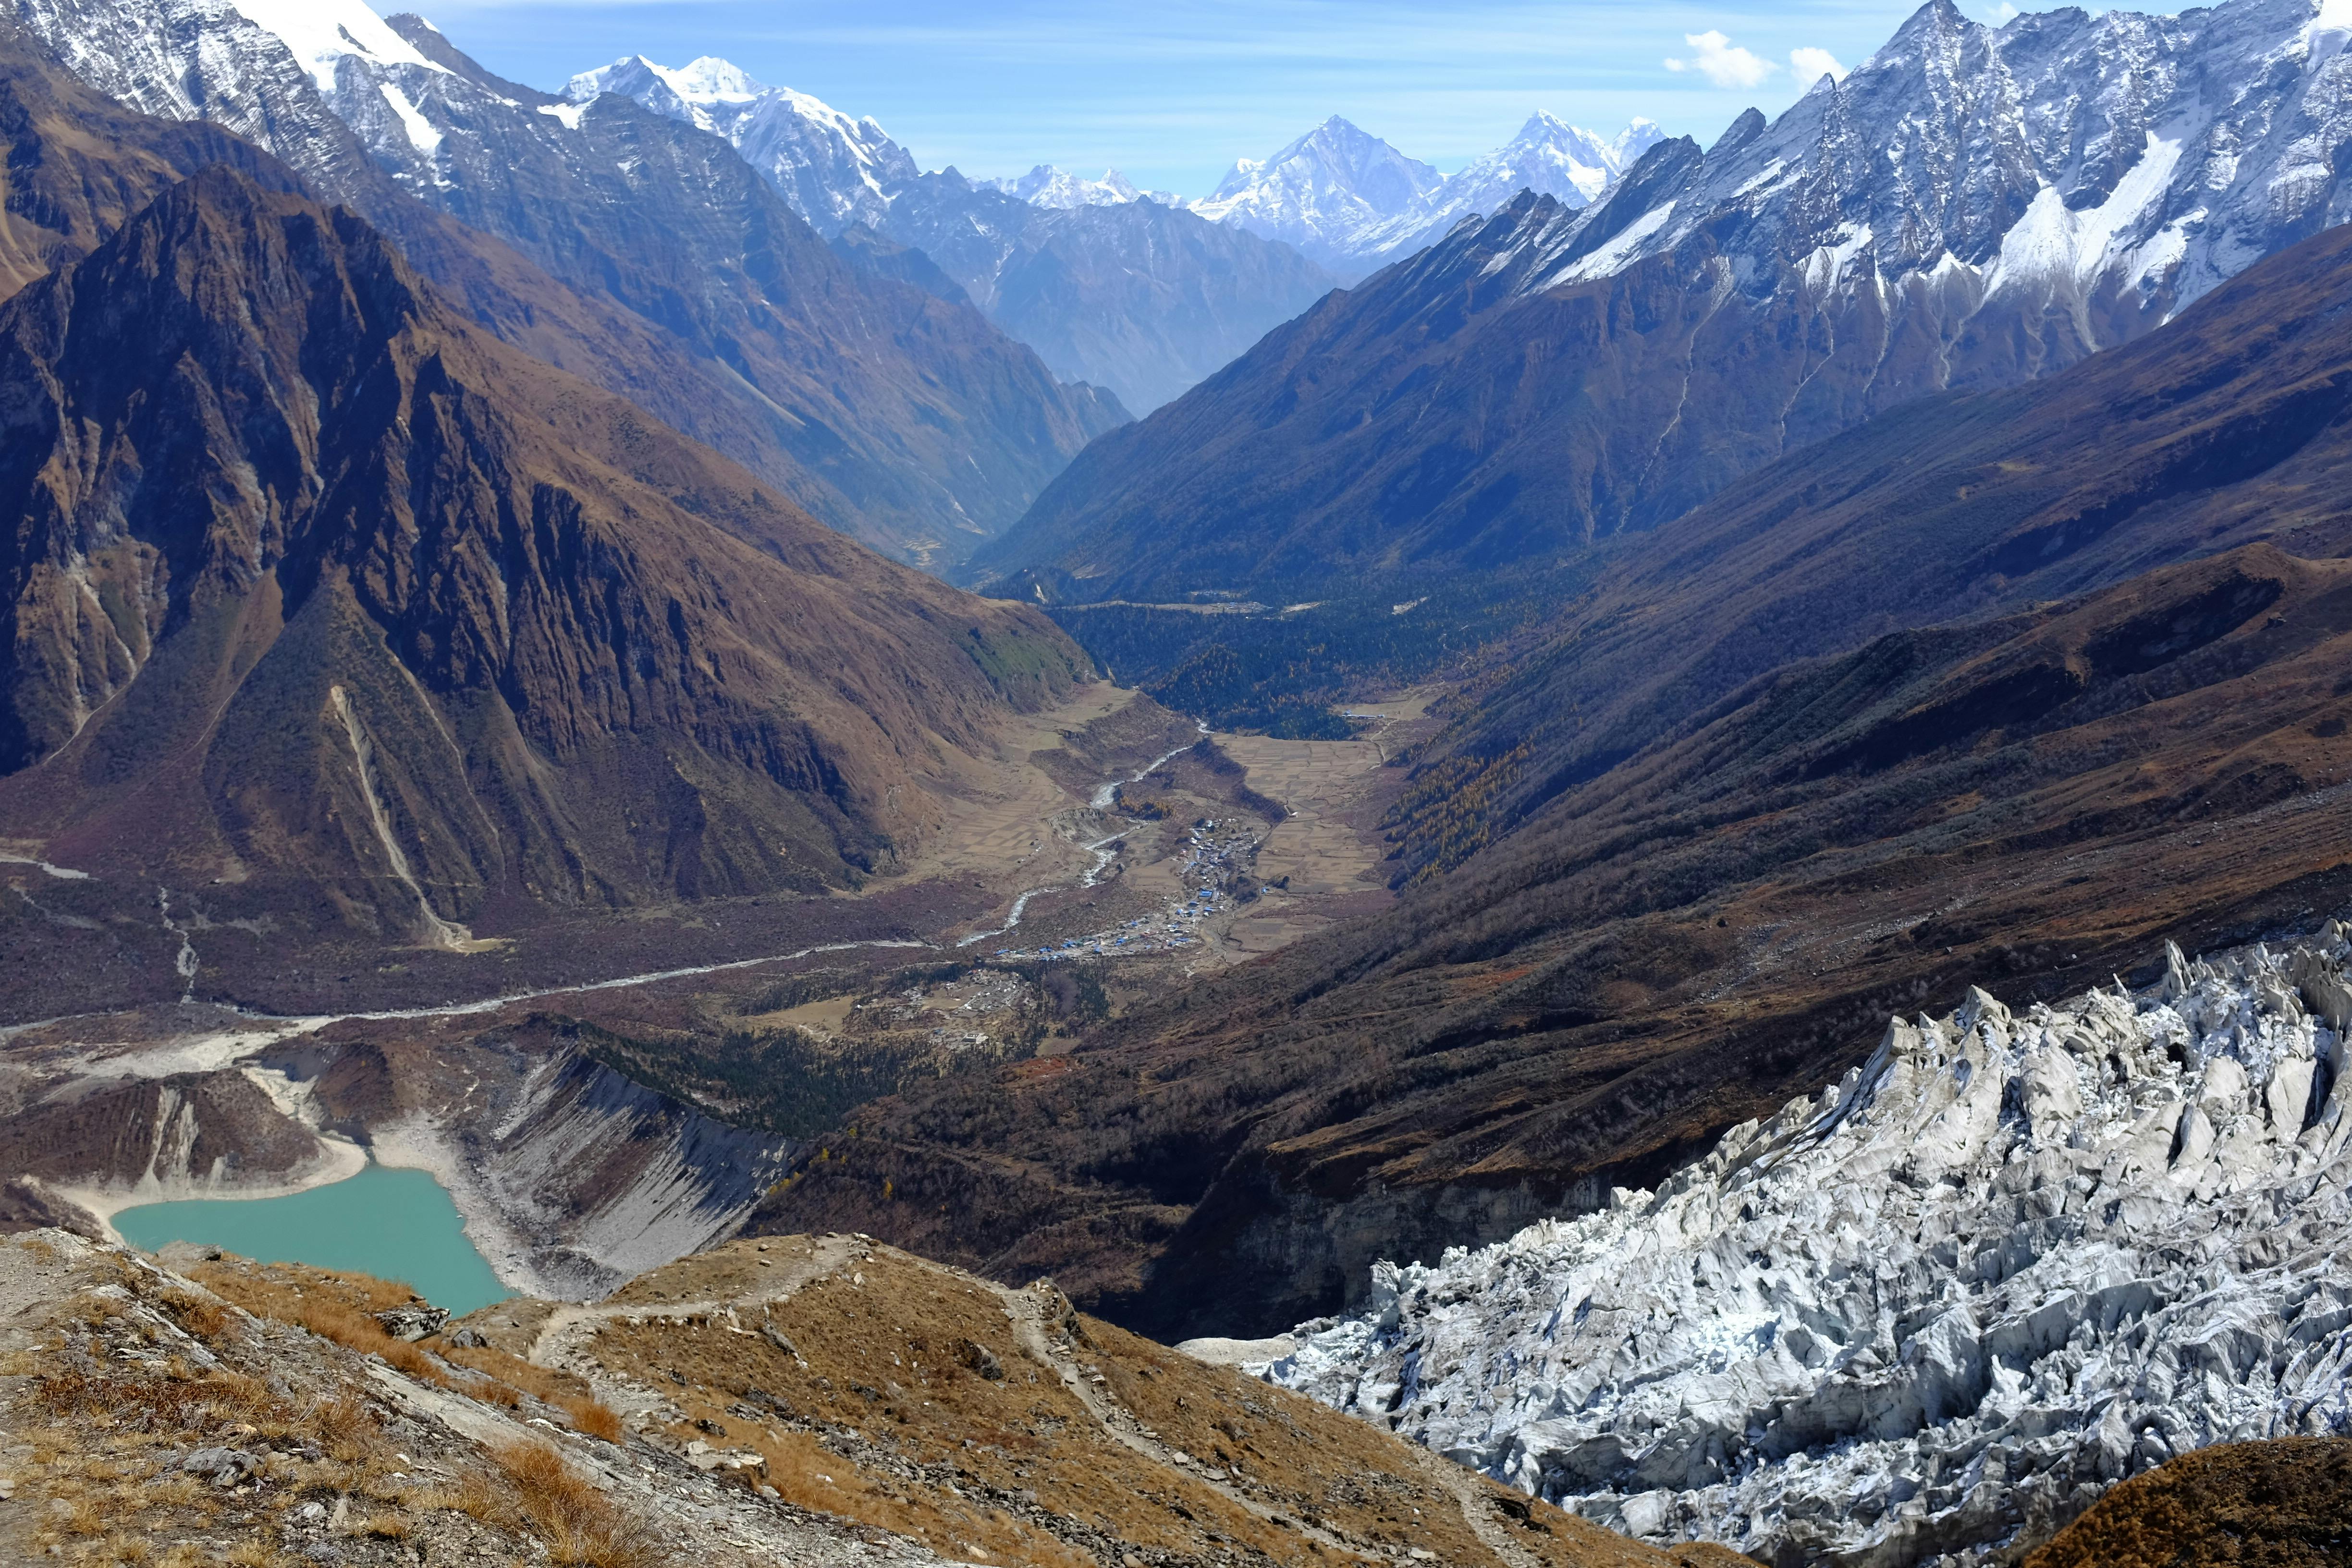
Packing Guide for Manaslu or Everest Base Camp Trek - part 1
Essential Packing Guide for Manaslu and Everest Base Camp Treks
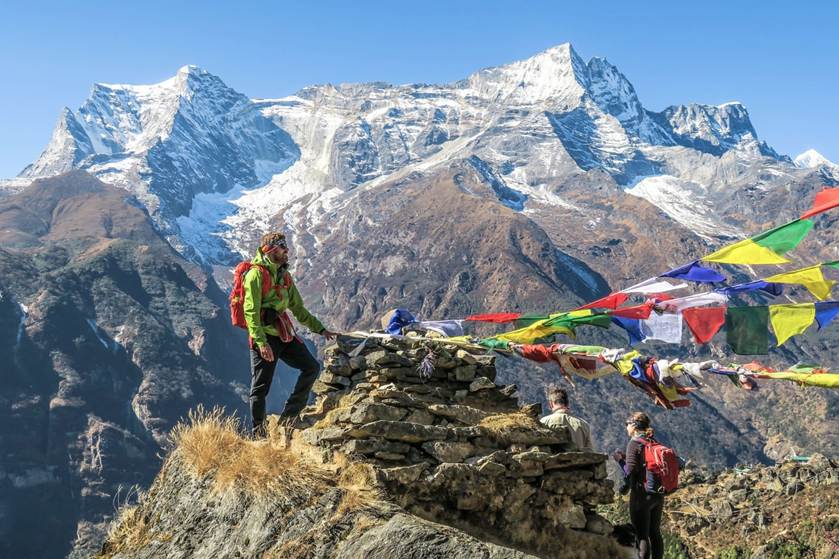
Everest Base Camp Trek
Introduction
The Himalayas stand as one of the world’s most magnificent mountain ranges, offering trekkers an unparalleled adventure through diverse landscapes, rich cultural experiences, and breathtaking vistas. Among the numerous trekking routes that crisscross this majestic range, the Manaslu Circuit Trek and the Everest Base Camp Trek have emerged as two of the most sought-after journeys for adventure enthusiasts worldwide. These treks present unique challenges and rewards, taking hikers through remote villages, ancient monasteries, lush forests, and high-altitude passes, all while showcasing some of the planet’s most impressive peaks.
Proper preparation is the cornerstone of a successful Himalayan trek. The remote nature of these trails, combined with their high altitude and variable weather conditions, demands careful planning and appropriate gear. Whether you’re drawn to the cultural richness and less-crowded paths of the Manaslu Circuit or the iconic journey to the base of the world’s highest peak on the Everest Base Camp Trek, having the right equipment can make the difference between a memorable adventure and a challenging ordeal.
This comprehensive guide focuses on essential packing considerations for both the Manaslu Circuit and Everest Base Camp treks, with a particular emphasis on tea house accommodations. Unlike expeditions that require camping equipment, tea house treks allow trekkers to stay in local lodges along the route, significantly reducing the gear needed. However, this doesn’t diminish the importance of bringing appropriate clothing, personal items, and medical supplies to ensure comfort, safety, and enjoyment throughout your journey.
In the following sections, we’ll explore the key differences between these two remarkable treks, break down the essential clothing and equipment needed for each, detail the contents of a well-prepared first aid kit (including vital altitude sickness medications), and provide practical packing strategies to optimize your trekking experience. Whether you’re a first-time Himalayan trekker or returning to these magnificent mountains, this guide aims to help you prepare thoroughly for the adventure that awaits.
Manaslu Circuit Trek
Understanding the Treks: Manaslu vs. Everest Base Camp
Before diving into packing specifics, it’s essential to understand the key characteristics of both treks, as these factors directly influence what you’ll need to bring along.
Geographical Overview
The Everest Base Camp (EBC) Trek takes place in the Khumbu region of northeastern Nepal, home to the Mahalangur Himal range, which includes four of the world’s six highest peaks: Everest (8,848m/29,029ft), Lhotse (8,516m), Makalu (8,485m), and Cho Oyu (8,188m). The trek begins with a flight from Kathmandu to Lukla (2,850m/9,350ft) and follows a well-established route through Sherpa villages, eventually reaching Everest Base Camp at 5,364m (17,598ft). The highest point most trekkers reach is Kala Patthar at 5,555m (18,225ft), which offers spectacular views of Mount Everest.
The Manaslu Circuit Trek, on the other hand, circumnavigates Mount Manaslu (8,163m/26,781ft), the eighth-highest mountain in the world, located in the Mansiri Himal range in north-central Nepal. This trek begins with a bus or jeep ride from Kathmandu to Soti Khola (730m/2,896ft) and follows a path through the Budhi Gandaki Valley, crossing the challenging Larkya La Pass (5,106m/16,752ft) before descending into the Annapurna region.
Altitude Considerations
Both treks involve significant altitude gain, which necessitates proper acclimatization and preparation for potential altitude-related issues. The EBC trek starts at a higher elevation in Lukla and involves a more rapid ascent, with trekkers reaching Namche Bazaar (3,440m/11,286ft) by the second day. The highest overnight stay is typically at Gorak Shep (5,164m/16,942ft).
The Manaslu Circuit begins at a much lower elevation, allowing for a more gradual acclimatization process as trekkers make their way up through various ecological zones. However, crossing Larkya La Pass presents a significant altitude challenge, with most trekkers spending the night at Dharmasala (4,460m/14,633ft) before tackling the pass early the next morning.
Weather Conditions
Both treks are best undertaken during the spring (March to May) and autumn (September to November) seasons when weather conditions are most favorable. During these periods, days are generally clear with moderate temperatures, offering excellent visibility of the mountain landscapes.
Spring brings blooming rhododendrons and other wildflowers, adding vibrant colors to the lower elevations of both treks. Temperatures gradually warm as the season progresses, though nights at higher altitudes remain cold.
Autumn offers the most stable weather conditions with clear skies and excellent mountain views. Temperatures are moderate during the day but can drop significantly at night, especially at higher elevations.
Winter (December to February) brings extremely cold temperatures and heavy snowfall at higher elevations, making certain sections of both treks challenging or impassable. The monsoon season (June to August) brings heavy rainfall, muddy trails, leeches at lower elevations, and limited visibility due to cloud cover.
Tea House Accommodations
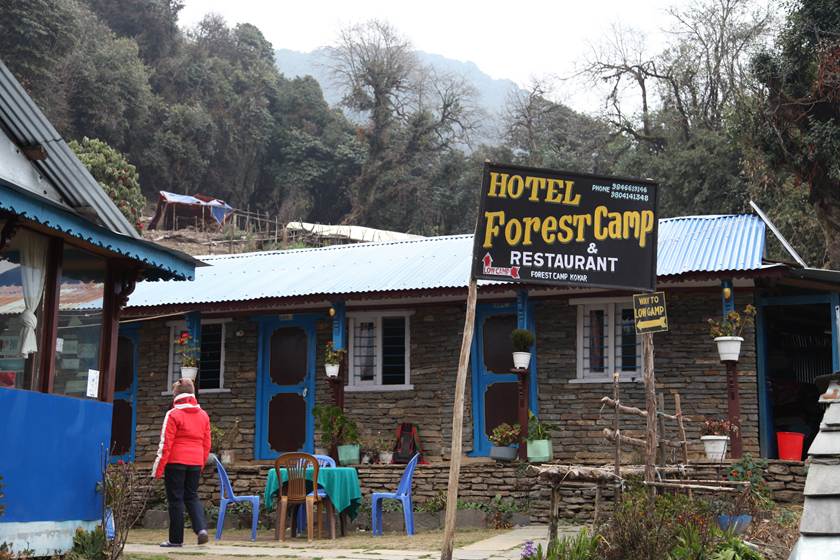
Tea House in the Himalayas
Both treks offer tea house accommodations, though with notable differences in quality and availability. The EBC trek, being more popular and established, features a wide range of tea houses varying from basic to relatively comfortable, especially in larger settlements like Namche Bazaar and Lukla. Many offer private rooms, dining areas with varied menus, and some even provide hot showers (usually for an additional fee) and Wi-Fi services.
The Manaslu Circuit, being less frequented, has more basic tea house facilities, particularly in the more remote sections of the trek. Accommodations are simpler, with shared rooms being more common, fewer menu options, and more limited amenities. However, this is changing as the trek gains popularity, with newer and more comfortable lodges being established along the route.
In both cases, tea houses typically provide a bed with a basic mattress, pillow, and blanket, though bringing your own sleeping bag is strongly recommended for hygiene and warmth. Most have shared bathroom facilities, and hot water is not always guaranteed, especially at higher elevations.
Cultural Aspects
The EBC trek passes through the land of the Sherpas, renowned for their mountaineering skills and rich Buddhist culture. Trekkers will encounter numerous monasteries, prayer wheels, mani walls (stone structures inscribed with Buddhist prayers), and colorful prayer flags. The region is predominantly Buddhist, following the Nyingma, Kagyu, and Gelug schools of Tibetan Buddhism.
The Manaslu Circuit offers a more diverse cultural experience, with the trail passing through areas inhabited by various ethnic groups including Gurungs, Tibetans, Tamangs, Brahmins, and others. The lower regions are predominantly Hindu, while the higher areas practice Buddhism, creating an interesting cultural transition as you ascend. The trek also passes through the restricted Manaslu Conservation Area, requiring special permits and the accompaniment of a registered guide.
Difficulty Levels
Both treks are challenging and require good physical fitness, but they present different types of difficulties. The EBC trek involves a more rapid altitude gain, which can increase the risk of altitude sickness if not properly acclimatized. The terrain is generally well-maintained with stone steps in many sections, though still physically demanding due to the continuous ascent and descent.
The Manaslu Circuit is considered slightly more challenging overall due to its longer duration (typically 14-16 days compared to EBC’s 12-14 days), more remote nature, and the crossing of Larkya La Pass, which can be snow-covered and technically demanding. The trail also features more varied terrain, including steep ascents, narrow paths along cliff edges, and river crossings.
Understanding these differences is crucial for preparing appropriately for either trek. Your packing list should account for the specific challenges, weather conditions, cultural considerations, and accommodation standards you’ll encounter along your chosen route.
Essential Clothing and Layering System
The key to comfortable trekking in the Himalayas lies in a versatile layering system that can adapt to the wide range of temperatures and weather conditions you’ll encounter. From the humid, warmer lower elevations to the cold, windy high-altitude passes, your clothing needs to provide appropriate protection while remaining lightweight and packable.

Trekking Gear and Equipment
The Three-Layer Principle
The most effective approach to Himalayan trekking attire follows the three-layer principle:
- Base Layer: Moisture-wicking fabrics that sit directly against your skin
- Mid Layer: Insulating materials that trap body heat
- Outer Layer: Weather-resistant shells that protect against wind, rain, and snow
This system allows you to add or remove layers as conditions change throughout the day or as you gain or lose elevation. Let’s break down each component in detail:
Base Layers
Base layers are your first defense against discomfort and serve the crucial function of wicking moisture away from your skin. When you sweat during strenuous uphill sections, proper base layers prevent that moisture from cooling against your body, which could otherwise lead to chills or hypothermia at higher elevations.
Recommended base layer items:
- 2-3 short-sleeve moisture-wicking t-shirts: Synthetic materials like polyester or natural fibers like merino wool are ideal. Avoid cotton as it retains moisture and takes too long to dry.
- 1-2 long-sleeve moisture-wicking shirts: Essential for cooler days and higher elevations.
- 1-2 pairs of thermal underwear/long johns: For cold nights and high-altitude sections, particularly important for the Larkya La Pass on the Manaslu Circuit or the final days approaching Everest Base Camp.
- 3-5 pairs of moisture-wicking underwear: Quick-drying, antimicrobial fabrics are worth the investment for multi-day treks.
- 3-5 pairs of trekking socks: Merino wool or synthetic blends with cushioning in the heel and toe areas. Consider bringing liner socks to prevent blisters on particularly challenging sections.
When selecting base layers, prioritize lightweight, quick-drying fabrics that pack down small. Merino wool is excellent for its natural antimicrobial properties (reducing odor on longer treks) and ability to regulate temperature, though it comes at a higher price point than synthetic alternatives.
Mid Layers
Mid layers provide insulation by trapping warm air close to your body. The thickness and number of mid layers you’ll need depend on the season and your personal cold tolerance.
Recommended mid layer items:
- 1-2 lightweight fleece jackets or pullovers: These versatile pieces can be worn alone in mild conditions or under a shell in colder weather.
- 1 heavier fleece or softshell jacket: For additional warmth during rest breaks or cold evenings in tea houses.
- 1 down or synthetic insulated jacket: Perhaps the most crucial item for high-altitude trekking. Down provides superior warmth-to-weight ratio but loses insulating properties when wet, while synthetic insulation performs better in damp conditions but is bulkier and heavier.
- 1-2 pairs of trekking pants: Lightweight, quick-drying pants with some stretch for comfort. Convertible pants with zip-off legs offer versatility for warmer lower elevations.
- 1 pair of fleece or softshell pants: For colder conditions, especially at higher elevations or during the colder seasons.
When selecting mid layers, consider packability alongside warmth. Modern insulated jackets can compress remarkably small while still providing excellent thermal protection when needed.
Outer Layers
Outer layers shield you from the elements—wind, rain, snow, and intense sun at high altitudes. Quality outer layers are essential for both comfort and safety in the changeable mountain environment.
Recommended outer layer items:
- 1 waterproof/breathable hardshell jacket: Look for durable water repellent (DWR) coating, sealed seams, and adequate ventilation options like pit zips. This is crucial for both treks, as afternoon showers can occur even during the dry seasons.
- 1 pair of waterproof/breathable hardshell pants: Full-length side zips make these easier to put on over boots when sudden weather changes occur.
- 1 lightweight windproof jacket or vest: Useful for windy conditions when a full rain shell would be too warm.
For both the Manaslu Circuit and EBC treks, ensure your outer layers can withstand sustained exposure to harsh conditions, particularly at higher elevations where weather can change rapidly.
Headwear
Proper head protection is vital in the mountains, where sun exposure is intense and temperatures can drop dramatically.
Recommended headwear items:
- 1 wide-brimmed sun hat or cap with neck protection: Essential for sun protection, especially on exposed trails.
- 1 warm beanie/wool hat: For cold evenings and high-altitude sections.
- 1 buff or neck gaiter: Versatile protection for neck, face, or head depending on conditions.
- Sunglasses with 100% UV protection: Category 3 or 4 lenses with side shields are recommended for high-altitude trekking to protect against intense solar radiation and glare from snow.
- 1 balaclava or face mask: Particularly useful for the cold, windy conditions often encountered at Larkya La Pass or on the approach to Everest Base Camp.
Handwear
Cold hands can quickly become painful and even dangerous at high altitudes, making proper gloves essential.
Recommended handwear items:
- 1 pair of lightweight liner gloves: For mild conditions or as a base layer under heavier gloves.
- 1 pair of insulated, waterproof gloves or mittens: For protection in cold, wet conditions, particularly important for high passes and early morning starts.
Footwear
Your feet are your primary mode of transportation on these treks, making appropriate footwear perhaps the most critical gear decision.
Recommended footwear items:
- 1 pair of waterproof hiking boots with ankle support: Well broken-in before your trek. Mid to high-cut boots with Vibram or similar quality soles provide the necessary traction and support for varied terrain.
- 1 pair of trail running shoes or lightweight trekking shoes: For easier sections and to wear in tea houses, giving your main boots time to dry if needed.
- 1 pair of sandals or flip-flops: For use in tea house showers and common areas.
- Gaiters: Optional but useful for keeping debris out of your boots, especially during early season treks when snow may still be present at higher elevations.
When selecting hiking boots, prioritize fit and comfort over all other considerations. Even the most technically advanced boots will cause problems if they don’t fit your feet properly. Allow time to break them in thoroughly before your trek, wearing them on multiple training hikes with similar terrain and duration.
Additional Clothing Considerations
- Quantity vs. Laundry: You can hand-wash lightweight items during your trek, though drying times increase at higher elevations and during colder or more humid periods. Plan accordingly.
- Tea House Comfort: Include a set of clean, comfortable clothes reserved exclusively for wearing in tea houses after each day’s trek.
- Cultural Sensitivity: In more traditional areas, particularly in the lower regions of the Manaslu Circuit, consider modest clothing options that cover shoulders and knees when interacting with locals.
- Weight Optimization: Every extra ounce matters when you’re carrying your pack for hours each day at high altitude. Prioritize lightweight, multipurpose items whenever possible.
By thoughtfully assembling your clothing system with these considerations in mind, you’ll be well-prepared for the variable conditions encountered on both the Manaslu Circuit and Everest Base Camp treks, allowing you to focus on enjoying the magnificent landscapes and cultural experiences rather than being distracted by preventable discomfort.
Backpacks and Bags
Choosing the right bags for your Himalayan trek is crucial for organizing your gear efficiently and ensuring comfortable transportation of your essentials. For tea house treks like the Manaslu Circuit and Everest Base Camp, you’ll need two primary bags: a main duffel bag or backpack (which porters or yaks will typically carry) and a daypack (which you’ll carry yourself).
Main Backpack or Duffel Bag
Most trekkers on tea house routes hire a porter to carry their main bag, which contains the bulk of their clothing and equipment not needed during the day’s hike. This arrangement allows you to trek with just a light daypack, making the challenging terrain more manageable.
Recommended specifications:
- Capacity: 60-80 liters is ideal for most trekkers. This provides ample space for all your gear without encouraging overpacking.
- Material: Durable, water-resistant fabrics like ripstop nylon with reinforced seams.
- Design considerations:
- If using a duffel bag: Look for models with comfortable shoulder straps and grab handles, making it easier for porters to carry. Many trekking companies provide their own duffel bags, so check before purchasing.
- If using a backpack: Choose one with a sturdy internal frame, padded hip belt, and adjustable suspension system. While porters will carry this most of the time, you should ensure it fits you properly in case you need to carry it yourself.
- Weight limit: Most trekking companies impose a 10-15kg (22-33lb) weight limit per porter, so pack accordingly.
Additional features to consider:
- Multiple compartments for organization
- Lockable zippers for security
- External compression straps to secure the load
- Bright color for easy identification among other trekkers’ bags
- Rain cover or waterproof construction
Daypack
Your daypack will be your constant companion on the trail, carrying essential items you’ll need access to throughout the day. Choosing the right daypack can significantly impact your trekking comfort.
Recommended specifications:
- Capacity: 25-35 liters provides enough space for daily essentials without becoming unwieldy.
- Features to prioritize:
- Padded shoulder straps and hip belt to distribute weight comfortably
- Chest strap to stabilize the load
- Ventilated back panel to reduce sweating
- External attachment points for trekking poles and water bottles
- Side compression straps to secure the load when partially full
- Quick-access pockets for snacks, camera, etc.
- Internal hydration sleeve and port for water bladder if you prefer this system
- Rain cover (built-in or separate)
Items typically carried in your daypack:
- Water (2-3 liters)
- Snacks for the day
- Rain gear and warm layer
- First aid kit
- Camera
- Sunscreen, lip balm, and personal medications
- Map and guidebook
- Headlamp (always carry, even for daytime treks)
- Toilet paper and hand sanitizer
- Money, permits, and documents
- Sunglasses and hat
Waterproofing Considerations
The Himalayas can experience sudden weather changes, and protecting your gear from moisture is essential. Even during the dry seasons, unexpected rain showers or snow can occur, particularly at higher elevations.
Effective waterproofing strategies:
- Pack covers: Both your main bag and daypack should have rain covers. These are the first line of defense against precipitation.
- Pack liners: Using a heavy-duty garbage bag or purpose-made pack liner inside your bags provides additional protection.
- Dry bags and stuff sacks: Organize your gear in waterproof stuff sacks or dry bags within your packs. This not only protects against external moisture but also contains any spills from water bottles or other liquids.
- Ziploc bags: Use these for electronics, documents, and other small items that must stay absolutely dry.
Weight Distribution and Packing Strategy
How you pack your bags can significantly affect your comfort and the accessibility of your gear.
For your main bag:
- Place infrequently used items at the bottom
- Keep similar items together in stuff sacks or packing cubes
- Place heavier items closer to your back (if using a backpack)
- Keep a change of clothes and essential toiletries easily accessible for arrival at tea houses
For your daypack:
- Place heavier items close to your back and centered
- Keep frequently accessed items in external or top pockets
- Distribute weight evenly from side to side
- Use the hip belt pockets for small essentials like lip balm or snacks
Special Considerations for Each Trek
For Everest Base Camp:
- The flight to Lukla has strict weight limitations (typically 10-15kg for checked bags and 5kg for carry-on). Pack accordingly or be prepared to pay excess baggage fees.
- The trail is well-established with relatively consistent terrain, so standard backpacks work well.
For Manaslu Circuit:
- The more remote sections may involve rougher trails and occasional stream crossings, so ensure your bags have robust waterproofing.
- The circuit nature of the trek means you’ll encounter more varied conditions, so organization systems that allow quick access to different layers and equipment are particularly valuable.
Renting vs. Buying
If you’re not a regular trekker, consider renting some equipment in Kathmandu rather than investing in expensive gear for a one-time use. Many trekking shops in Thamel (Kathmandu’s tourist district) offer rental services for quality backpacks and duffel bags at reasonable rates. However, ensure any rented equipment fits properly and is in good condition before departing for your trek.
Sleeping Items
While tea houses along both the Manaslu Circuit and Everest Base Camp treks provide basic beds with mattresses and sometimes blankets, bringing your own sleeping equipment is essential for comfort, hygiene, and warmth, especially at higher elevations where nighttime temperatures can drop significantly below freezing.
Sleeping Bag
A quality sleeping bag is perhaps the most important sleeping item for your Himalayan trek. Tea house rooms are unheated (except for common dining areas, which typically have a stove burning only in the evening), and temperatures inside your room can fall well below freezing at higher elevations.
Recommended specifications:
- Temperature rating: For spring and autumn treks, a sleeping bag rated for -10°C to -15°C (14°F to 5°F) is recommended. For winter treks, consider an even warmer rating of -20°C (-4°F) or lower.
- Insulation type:
- Down: Offers the best warmth-to-weight ratio and compressibility, making it ideal for trekking. Look for bags with water-resistant down treatment (such as hydrophobic down) and a fill power of 650 or higher for optimal performance. Down bags are more expensive but are worth the investment for the weight savings and comfort.
- Synthetic: More affordable and performs better when damp, but heavier and bulkier than down. A good option for budget-conscious trekkers or those concerned about potential moisture issues.
- Shape: Mummy-shaped bags are most efficient for heat retention and pack size.
- Weight: Aim for under 2kg (4.4lbs) to minimize your load.
- Features to consider:
- Draft collar and hood to prevent heat loss
- Full-length, two-way zipper for ventilation options
- Internal pocket for keeping small items warm (like camera batteries)
- Compression stuff sack to minimize packed size
Trek-specific considerations:
- For the Everest Base Camp trek, which reaches higher elevations and generally has colder nights, prioritize warmth in your sleeping bag selection.
- For the Manaslu Circuit, which covers more varied elevations and climates, a slightly more versatile sleeping bag with good ventilation options might be preferable for the lower, warmer sections.
Sleeping Bag Liner
A sleeping bag liner serves multiple purposes: it adds warmth to your sleeping bag, provides a clean barrier between you and potentially less-than-pristine tea house bedding, and can be used alone in lower, warmer regions or if your sleeping bag proves too warm.
Recommended specifications:
- Material options:
- Silk: Lightweight, compact, adds approximately 5°C (9°F) of warmth, and feels luxurious against the skin. The premium choice for serious trekkers.
- Synthetic/microfiber: More affordable than silk, adds similar warmth, but slightly heavier and bulkier.
- Thermal fleece: Adds significant warmth (up to 15°C/27°F) but is bulkier and heavier than other options.
- Cotton: Inexpensive and comfortable but adds minimal warmth and takes longer to dry if washed. Not recommended for high-altitude treks.
- Shape: Mummy-shaped to match your sleeping bag, though rectangular liners offer more room to move.
Pillow Options
Tea houses typically provide basic pillows, but these can be of questionable cleanliness and comfort. Consider these options:
- Inflatable travel pillow: Lightweight and compressible, these pack down small and provide reasonable comfort. Look for models with soft outer fabric rather than the plastic feel of cheaper options.
- Compressible foam pillow: More comfortable than inflatable options but bulkier and heavier.
- Stuffable pillow case: A pillowcase that you can stuff with clothes to create a makeshift pillow. Ultralight option but less comfortable than dedicated pillows.
- Buff or fleece jacket: In a pinch, a buff pulled over a fleece jacket can serve as a basic pillow.
Additional Sleeping Considerations
- Earplugs and eye mask: Tea house walls are typically thin, and other trekkers may be noisy. Earplugs and an eye mask can significantly improve sleep quality.
- Sleeping pad: Generally not necessary for tea house treks as beds with mattresses are provided. However, some trekkers bring a thin foam or inflatable pad for additional insulation and comfort, particularly on the Manaslu Circuit where mattresses might be thinner in more remote tea houses.
- Warm layers for sleeping: Dedicated sleeping clothes like thermal long underwear and a clean pair of socks can improve comfort and keep your sleeping bag cleaner.
- Hot water bottle: Some trekkers bring a small, lightweight hot water bottle to pre-warm their sleeping bag on particularly cold nights. Tea houses can usually provide hot water to fill it.
Care and Use Tips
- Air out your sleeping bag: Whenever possible, air out your sleeping bag during rest days or upon arrival at tea houses to prevent moisture buildup from condensation and perspiration.
- Compression considerations: While compression sacks are convenient for packing, avoid keeping your sleeping bag compressed for extended periods as this can damage the insulation. Unpack it as soon as you reach your accommodation.
- Emergency warmth: In extremely cold conditions, wearing your down jacket inside your sleeping bag can significantly increase warmth.
- Sleeping bag storage: When not on the trail, store your sleeping bag uncompressed in a large cotton or mesh storage sack to maintain loft and insulation properties.
By carefully selecting appropriate sleeping equipment, you can ensure restful nights that allow your body to recover from the day’s exertions and prepare for the challenges ahead. Quality sleep is not just a comfort issue but a safety consideration, as fatigue can impair judgment and increase the risk of accidents on the trail.
Personal Items and Toiletries
Maintaining personal hygiene during your Himalayan trek is important not only for comfort but also for health. While you’ll need to adapt to more basic conditions than you might be accustomed to at home, bringing the right personal items can significantly enhance your trekking experience. Remember that weight and space are premium considerations, so focus on multipurpose items and minimal packaging.
Basic Toiletries
- Biodegradable soap: A small bottle of biodegradable, multipurpose soap can serve for body washing, laundry, and even shampoo. Look for concentrated formulas that require minimal water.
- Shampoo and conditioner: If not using multipurpose soap, bring small bottles or solid bars. Solid shampoo and conditioner bars are excellent for trekking as they’re lightweight, compact, and last longer than liquid equivalents.
- Toothbrush and toothpaste: A regular toothbrush with a cover to keep it clean, plus a small tube of toothpaste.
- Deodorant: A small, solid deodorant is preferable to aerosols or large containers.
- Moisturizer: High altitude and dry mountain air can severely dry out your skin. A small tube of intensive moisturizer is essential.
- Lip balm with SPF: The combination of sun, wind, and dry air makes chapped lips almost inevitable without protection. Bring at least two tubes as they’re easy to lose.
- Sunscreen: High-SPF (50+) sunscreen is absolutely essential. UV radiation increases approximately 4% for every 300m (1,000ft) gain in elevation, making sun protection critical at high altitudes. Choose a water/sweat-resistant formula and bring enough for frequent reapplication.
- Hand sanitizer: A small bottle of alcohol-based hand sanitizer is crucial for maintaining hygiene, especially before meals and after using toilet facilities.
- Wet wipes/baby wipes: When shower facilities are unavailable or unappealing, wet wipes can provide a quick refresh. Choose biodegradable options to minimize environmental impact.
Personal Hygiene
- Quick-dry towel: Microfiber towels dry quickly and pack down small. A medium-sized towel is sufficient for most needs.
- Toilet paper: Not always provided in tea houses and never available on the trail. Bring a roll or two in a ziplock bag to keep it dry. Some trekkers remove the cardboard core to save space.
- Women’s hygiene products: Bring an adequate supply as these items may be unavailable or expensive along the trekking routes. Consider menstrual cups as a space-saving, environmentally friendly alternative to disposable products.
- Nail clippers: Small but useful for both comfort and preventing snags in clothing and sleeping bags.
- Tweezers: Useful for removing splinters or ticks.
- Shaving kit: Optional and minimalist if included.
- Hair ties and/or bandana: For keeping hair managed on windy days or when washing facilities are limited.
Health and Protection Items
- Insect repellent: Primarily needed for lower elevations, especially during spring and summer months. Above 3,000m (9,800ft), insects are rarely an issue.
- Blister prevention and treatment: Moleskin, athletic tape, or specialized blister bandages can save your trek if foot problems develop.
- Powder: Talcum or foot powder can help prevent chafing and keep feet dry.
- Glasses/contacts: Bring a spare pair of glasses if you wear them, as replacement options will be unavailable on the trail. If you wear contact lenses, bring sufficient supplies and solutions, plus glasses as backup.
- Prescription medications: Bring an adequate supply of any prescription medications you take regularly, plus a copy of your prescription using generic names (not brand names) in case you need to replace them.
Laundry Considerations
- Clothesline: A lightweight cord to hang clothes for drying.
- Universal sink plug: Tea house sinks often lack plugs, making washing clothes challenging without this simple item.
- Travel laundry soap: If not using multipurpose biodegradable soap mentioned earlier.
- Stain remover: Optional but useful for stubborn stains.
Comfort Items
- Ear plugs and eye mask: Tea house walls are thin, and roommates or neighbors may snore or move around at night. Quality sleep is crucial for recovery and enjoyment of your trek.
- Kindle or small book: For entertainment during rest days or evenings. A Kindle or e-reader saves significant weight compared to physical books if you’re an avid reader.
- Playing cards or small games: For socializing with fellow trekkers or passing time during rest days.
- Journal and pen: For recording your experiences and observations.
- Comfort snacks from home: A few favorite snacks can provide a psychological boost when you’re tired or the local food options become monotonous.
Special Considerations for Each Trek
For Everest Base Camp:
- More developed tea houses often offer hot shower facilities (for an additional fee), so shower-specific toiletries might be worth the extra weight.
- The more established tourist infrastructure means basic toiletries can be purchased along the route, though at significantly inflated prices.
For Manaslu Circuit:
- The more remote nature of this trek means fewer opportunities to purchase forgotten items, so be thorough in your packing.
- Shower facilities are more basic and less common, making wet wipes and dry shampoo more valuable.
- Cultural sensitivity is particularly important in the more traditional villages along this route, so modest clothing for washing and conservative bathroom habits are appreciated.
Packing Tips for Toiletries
- Decant products into smaller containers rather than bringing full-sized bottles.
- Use solid products when possible (shampoo bars, solid deodorant, etc.) to eliminate the risk of leaks and reduce weight.
- Double-bag liquids in ziplock bags to prevent leakage onto clothing or sleeping gear.
- Label everything, especially if transferring products to generic containers.
- Consider multipurpose products like combination shampoo/conditioner or soap that works for body, hair, and laundry.
- Pack toiletries accessibly for the first night, especially if arriving late at your first tea house.
Remember that while personal hygiene is important, the Himalayan environment is fragile. Always dispose of waste properly, use biodegradable products when possible, and minimize your impact on the local water sources and ecosystems.
Electronics and Accessories
Modern trekking often involves bringing various electronic devices to enhance the experience, capture memories, and maintain safety. However, the remote nature of both the Manaslu Circuit and Everest Base Camp treks presents unique challenges for electronic devices, including limited charging opportunities, cold temperatures that affect battery life, and the need to balance functionality with weight considerations.
Essential Electronics
Headlamp/Flashlight
A reliable headlamp is arguably the most important electronic device for your Himalayan trek. Power outages are common in tea houses, trails can be dark if you start before sunrise (common for high pass crossings or summit viewpoints), and having your hands free is invaluable.
Recommended specifications:
- Brightness: Minimum 200-300 lumens for adequate visibility on trails
- Battery type: Models that use widely available batteries (AAA or AA) are preferable to proprietary rechargeable batteries that can’t be replaced on the trail
- Features to consider:
- Red light mode to preserve night vision and avoid disturbing others in shared accommodations
- Adjustable brightness settings to conserve battery life
- Water resistance for unexpected rain or snow
- Comfortable headband that can fit over a hat in cold conditions
Bring spare batteries: Cold temperatures significantly reduce battery life. Store spare batteries in an inside pocket close to your body to keep them warm.
Camera Equipment
The spectacular landscapes of the Himalayas deserve quality photography, but balance your desire for perfect shots with practical weight considerations.
Options to consider:
- Smartphone camera: Modern smartphones offer excellent photography capabilities in a compact package that serves multiple purposes. If using your phone as your primary camera, consider a small tripod attachment and perhaps an external lens kit.
- Compact digital camera: Offers better quality than most smartphones with optical zoom capabilities while remaining relatively lightweight.
- Mirrorless or DSLR camera: Provides superior image quality and creative control but adds significant weight and bulk. If bringing a larger camera:
- Limit yourself to 1-2 versatile lenses rather than carrying a full kit
- Consider a lightweight carbon fiber tripod for low-light shots
- Bring sufficient memory cards as they may be unavailable or expensive along the route
Camera accessories:
- Extra batteries: Cold temperatures drastically reduce battery life. Keep spare batteries in an inside pocket close to your body.
- Lens cleaning kit: Dust is common on the trails, and a microfiber cloth and blower are essential for maintaining image quality.
- Protective case: To shield your equipment from dust, moisture, and impacts.
- Dry bags or waterproof cases: For additional protection during rain or snow.
Mobile Phone
Beyond photography, your smartphone can serve multiple functions: communication device, navigation tool, e-reader, journal, and entertainment center.
Preparation tips:
- SIM card: Local Nepali SIM cards with data packages are inexpensive and available in Kathmandu. Network coverage extends to many parts of both trekking routes, though with significant gaps in more remote areas.
- Offline functionality: Download maps, guides, books, and entertainment before your trek, as internet access will be limited and often slow when available.
- Protection: A rugged case and screen protector are worthwhile investments.
- Power saving: Learn your phone’s power-saving features and disable unnecessary services like Bluetooth and background app refresh to extend battery life.
Power Banks
With limited charging opportunities along both treks, a reliable power bank is essential for keeping electronic devices functioning throughout your journey.
Recommended specifications:
- Capacity: 10,000-20,000 mAh provides a good balance of charging capability and weight
- Ports: Multiple USB outputs allow charging several devices simultaneously
- Input: Fast-charging input reduces the time needed when you do have access to power
- Features to consider:
- Pass-through charging capability (can charge devices while the power bank itself is charging)
- Built-in cables for convenience
- LED indicators showing remaining capacity
Important note: Like all batteries, power banks perform poorly in cold conditions. Keep them in an inside pocket during the day and in your sleeping bag at night in very cold conditions.
Optional Electronics
GPS Device
While not essential given the well-established nature of both trekking routes and the availability of guides, a dedicated GPS device can provide peace of mind and additional safety.
Options include:
- Handheld GPS units: More rugged and with longer battery life than smartphones, but add extra weight and cost
- GPS watches: Combine time-keeping, fitness tracking, and basic navigation in a compact package
- Satellite communicators: Devices like Garmin InReach allow two-way text communication and emergency signaling via satellite in areas without cell coverage
E-reader
For longer treks or avid readers, an e-reader like a Kindle provides access to multiple books with minimal weight penalty. Most models have battery life measured in weeks rather than hours, making them ideal for trekking.
Solar Charger
Solar chargers can be useful supplements to power banks, especially for longer treks like the Manaslu Circuit. However, their effectiveness is limited by several factors:
- Trail time often involves moving through forests or valleys with limited direct sunlight
- Cloudy conditions reduce charging efficiency
- The weight-to-charging ratio is generally less favorable than simply carrying a larger power bank
If you do opt for a solar charger, look for models with integrated batteries that store power rather than those that only charge devices directly in sunlight.
Charging Opportunities and Costs
Everest Base Camp Trek
The EBC trek has relatively good charging infrastructure:
- Most tea houses offer charging services for a fee (typically 200-500 NPR per device, approximately $1.50-$4.00)
- Higher-end lodges, particularly in Namche Bazaar and Lukla, may include charging in the room price
- Quality of electrical supply varies, with voltage fluctuations common
- Some locations offer solar charging stations
Manaslu Circuit Trek
Charging opportunities are more limited on the Manaslu Circuit:
- Fewer tea houses have reliable electricity
- When available, charging typically costs 300-600 NPR per device ($2.25-$4.50)
- Solar charging is more common in remote areas
- Power outages and voltage fluctuations are frequent
Protection and Storage
Electronic devices require special protection in the harsh mountain environment:
- Waterproof cases or dry bags for all electronics
- Padded cases for cameras and fragile equipment
- Silica gel packets to absorb moisture
- Lens filters for cameras to protect against UV radiation and scratches
- Cable organizers to prevent tangling and damage to connectors
Battery Performance in Cold Conditions
Cold temperatures significantly impact battery performance, a particular concern at higher elevations where nighttime temperatures can drop well below freezing. To maximize battery life:
- Keep devices and spare batteries in interior pockets close to your body during the day
- Sleep with essential devices and spare batteries in your sleeping bag at night
- Turn devices off completely when not in use rather than leaving them in standby mode
- Allow cold batteries to warm up before attempting to use them
- Consider lithium batteries for devices that use standard battery sizes, as they perform better in cold conditions than alkaline batteries
Electronics Etiquette
While electronic devices enhance many aspects of trekking, they can also detract from the wilderness experience and impact others:
- Use headphones when listening to music or watching videos in shared spaces
- Ask permission before photographing local people, especially in more traditional areas along the Manaslu Circuit
- Silence notifications and unnecessary sounds
- Be present and mindful—limit device use to avoid missing the experiences around you
- Consider designating “device-free” periods to fully immerse yourself in the mountain environment
By thoughtfully selecting and managing your electronic devices, you can enhance your trekking experience while maintaining the connection to the natural world that draws so many to the Himalayas in the first place.
Documents and Money
Proper documentation and financial preparation are crucial aspects of your Himalayan trek that are often overlooked in the excitement of planning gear and equipment. Both the Manaslu Circuit and Everest Base Camp treks have specific permit requirements, and the remote nature of these routes necessitates careful consideration of how you’ll carry and access money throughout your journey.
Essential Documents
Passport and Visas
- Passport: Must be valid for at least six months beyond your planned departure date from Nepal. Bring the original passport on your trek, as checkpoints along both routes require it for verification.
- Nepal visa: Available on arrival at Tribhuvan International Airport in Kathmandu for most nationalities. Options include 15-day ($30), 30-day ($50), and 90-day ($125) tourist visas. Bring cash (USD preferred) and passport photos for this process, or complete the online form before arrival to expedite the process.
- Passport copies: Carry several photocopies of your passport information page and Nepal visa, stored separately from your original documents. Also keep digital copies in secure cloud storage and email a copy to yourself and a trusted contact.
Trekking Permits
For Everest Base Camp Trek:
- Sagarmatha National Park Entry Permit: Cost is 3,000 NPR (approximately $23) for foreign nationals. Available at the Nepal Tourism Board in Kathmandu or at the park entrance in Monjo.
- Khumbu Pasang Lhamu Rural Municipality Entrance Permit: This local permit (formerly known as the TIMS card) costs 2,000 NPR (approximately $15) and can be obtained in Lukla or Monjo.
For Manaslu Circuit Trek:
- Manaslu Restricted Area Permit: This special permit costs $100 per person for the first week (in September-November) and $15 for each additional day. In other seasons (December-August), the cost is $75 for the first week and $10 for each additional day. This permit requires trekking with an authorized guide and a minimum of two trekkers.
- Annapurna Conservation Area Project (ACAP) Permit: Cost is 3,000 NPR (approximately $23) as the trek exits through the Annapurna region.
- Manaslu Conservation Area Project (MCAP) Permit: Cost is 3,000 NPR (approximately $23).
Important notes about permits:
- Most organized treks include permit costs in their packages and handle the paperwork for you.
- If arranging permits independently, bring passport-sized photos (2-4 depending on the permits needed).
- Keep permits accessible during your trek, as they will be checked at multiple checkpoints.
- Trekking in restricted areas without proper permits carries severe penalties, including fines and potential deportation.
Insurance Documentation
Comprehensive travel insurance with specific coverage for high-altitude trekking and emergency evacuation is absolutely essential for both treks. Standard travel insurance often excludes activities above certain elevations or may not cover helicopter evacuations, which can cost $5,000-$10,000 from remote areas.
Required insurance documentation:
- Insurance policy certificate: Physical and digital copies with policy number, emergency contact numbers, and coverage details
- Emergency assistance contact information: International and local numbers for your insurance provider’s emergency assistance service
- Claim forms: Some insurers provide these in advance to expedite claims if needed
Recommended minimum coverage:
- Medical expenses: $100,000+
- Emergency evacuation/repatriation: $100,000+
- Coverage for altitudes up to 6,000m (19,685ft)
- Coverage specifically mentioning trekking or hiking activities
- Trip cancellation and interruption coverage
Money Matters
Cash Considerations
The remote nature of both treks means cash is king once you leave Kathmandu. ATMs are available in Namche Bazaar on the EBC trek but are less reliable and often charge high fees. There are no ATMs along the Manaslu Circuit.
Recommendations for cash:
- Nepali Rupees (NPR): The primary currency you’ll need on the trek. Exchange money in Kathmandu where rates are most favorable.
- US Dollars: Keep a small emergency reserve of clean, newer USD bills (post-2009) in various denominations.
- Daily budget: Plan for approximately 3,000-5,000 NPR ($23-38) per day for food, accommodation, and incidentals on the EBC trek, and slightly less on the Manaslu Circuit. This varies based on your preferences for room types, food choices, and extras like hot showers or charging.
- Additional expenses: Budget extra for side trips, souvenirs, tips for guides and porters (customary and appreciated), and unexpected contingencies.
Money Security
- Money belt or hidden pouch: Worn under clothing to secure the bulk of your cash and important documents
- Daily wallet: A separate, easily accessible wallet with just enough money for the day’s expenses
- Distribution strategy: Divide your money and keep it in multiple secure locations among your belongings
- Waterproof protection: Use waterproof pouches or ziplock bags to protect paper currency and documents
Cards and Digital Payment Options
While cash is primary, cards provide important backup:
- Credit cards: Major credit cards (Visa and Mastercard preferred) are accepted at higher-end establishments in Kathmandu and occasionally in larger settlements like Namche Bazaar, but rarely elsewhere on the treks.
- Debit cards: Useful for ATM withdrawals in Kathmandu and Namche Bazaar. Notify your bank of your travel plans to prevent cards from being blocked for suspicious activity.
- Digital payment apps: Services like Khalti and eSewa are increasingly popular in Nepal but have limited utility on trekking routes due to connectivity issues.
Emergency Information
Beyond financial and identification documents, carry these essential information items:
- Emergency contacts: List of family contacts, embassy information, insurance details, and local emergency numbers
- Medical information: Blood type, allergies, medical conditions, and medications on a card in your wallet and first aid kit
- Guide and trekking company details: Contact information for your guide, porter, and trekking company
- Itinerary copy: Detailed trek plan with expected accommodations and dates
Document Organization and Protection
- Document organizer: A waterproof travel wallet or pouch to keep all important papers together
- Digital backups: Scan all important documents before departure and store copies in cloud storage accessible from your phone
- Email copies: Send document scans to your email and to a trusted contact at home
- Separation strategy: Never keep all original documents, copies, and digital versions in the same place
Special Considerations for Each Trek
For Everest Base Camp:
- The more established tourism infrastructure means credit cards are occasionally accepted in Namche Bazaar and Lukla, though often with surcharges of 3-5%.
- Wi-Fi is more readily available (though still limited and often paid), making access to digital documents and online banking more feasible.
For Manaslu Circuit:
- The remote nature of this trek means you should be entirely self-sufficient with cash once you leave Kathmandu.
- The restricted area status requires more documentation and checkpoint procedures, so keep permits easily accessible.
- Guide requirements mean you’ll have local assistance with navigating permit checkpoints, but you should still understand the requirements personally.
Pre-Departure Documentation Checklist
- Passport (valid for 6+ months)
- Nepal visa or visa application materials
- Trekking permits or materials to obtain them
- Travel insurance policy with high-altitude coverage
- International driving permit (if planning to drive in Nepal)
- Vaccination records (if required)
- Passport photos (4-6) for permits and visa
- Emergency contact card
- Medical information card
- Photocopies of all important documents
- Digital backups of all documents
By thoroughly preparing your documentation and financial resources before departure, you’ll avoid unnecessary stress and complications during your trek, allowing you to focus on the extraordinary landscapes and cultural experiences that make the Himalayan journeys so rewarding.