
Packing Guide for Manaslu or Everest Base Camp Trek - part 2
First Aid Kit and Medications
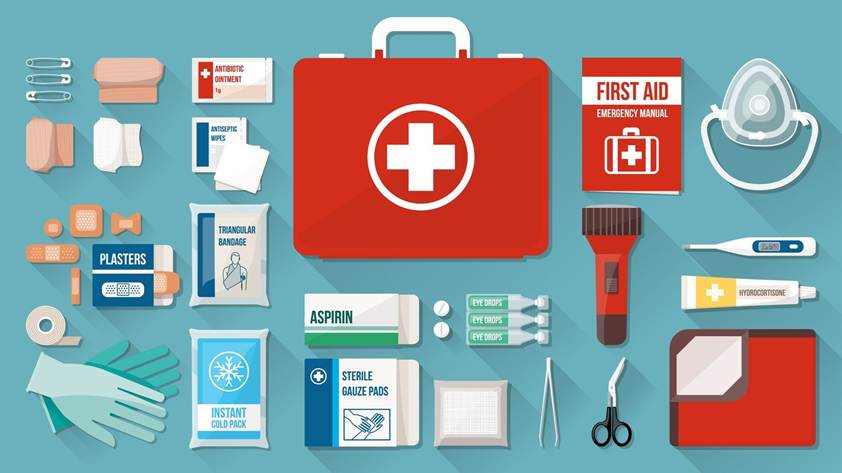
First Aid Kit for Himalayan Treks
A well-prepared first aid kit is an essential component of your Himalayan trekking gear. The remote nature of both the Manaslu Circuit and Everest Base Camp treks, combined with the physical challenges and altitude considerations, makes medical self-sufficiency particularly important. While serious medical emergencies will require evacuation, being prepared to handle common ailments and minor injuries can make the difference between continuing your trek comfortably and having to turn back prematurely.
Altitude Sickness Medications and Prevention
Altitude-related illnesses are the most serious health concern for trekkers in the Himalayas. Both the Manaslu Circuit and Everest Base Camp treks take you well into the high-altitude zone (above 2,500m/8,200ft), where Acute Mountain Sickness (AMS) becomes a risk. More severe forms of altitude illness include High Altitude Pulmonary Edema (HAPE) and High Altitude Cerebral Edema (HACE), both of which can be life-threatening if not addressed promptly.
Essential Altitude Medications
1. Acetazolamide (Diamox)
This medication helps accelerate acclimatization and is the primary pharmaceutical prevention and treatment for mild to moderate AMS.
- Dosage for prevention: Typically 125mg twice daily, starting 24 hours before ascending above 2,500m (8,200ft) and continuing for 48 hours after reaching your highest altitude
- Dosage for treatment: 250mg twice daily until symptoms resolve
- Quantity to bring: 20-30 tablets (125mg or 250mg) depending on trek duration
- Side effects: Increased urination, tingling in fingers and toes, altered taste of carbonated beverages
- Precautions: Not suitable for those allergic to sulfa drugs; consult your doctor before use
2. Dexamethasone
A powerful steroid used for treating moderate to severe altitude sickness, particularly with cerebral edema symptoms. This is an emergency medication that buys time for descent, not a substitute for descending.
- Dosage: Typically 4mg every 6 hours for severe AMS or HACE
- Quantity: 8-12 tablets (4mg)
- Important note: This is a prescription medication that should only be used in emergencies and ideally under medical guidance. It treats symptoms but does not help acclimatization.
3. Nifedipine
Used specifically for High Altitude Pulmonary Edema (HAPE), this medication helps reduce pulmonary artery pressure.
- Dosage: Typically 10mg initially, then 30mg extended-release every 12-24 hours
- Quantity: 4-6 tablets
- Important note: Like dexamethasone, this is an emergency medication that provides temporary relief while descending, not a substitute for descent.
Non-Pharmaceutical Altitude Illness Prevention
- Proper acclimatization: The most important prevention strategy is a conservative ascent profile. Follow the guideline of “climb high, sleep low” and limit altitude gain to 300-500m (1,000-1,600ft) per day once above 3,000m (9,800ft).
- Rest days: Include acclimatization days in your itinerary, typically every 3-4 days or every 1,000m (3,300ft) of elevation gain.
- Hydration: Drink 3-4 liters of water daily to help your body adjust to altitude.
- Avoid alcohol and sedatives: These can suppress respiration and worsen symptoms.
- Recognize early symptoms: Headache, nausea, dizziness, fatigue, loss of appetite, and disturbed sleep are early warning signs that should not be ignored.
Basic First Aid Supplies
Wound Care
- Adhesive bandages: Various sizes for minor cuts and blisters (15-20)
- Gauze pads: Sterile, individually wrapped, 2x2 and 4x4 inches (5-10 of each)
- Adhesive tape: Medical-grade, for securing bandages (1 roll)
- Elastic bandage: For sprains and strains (1-2)
- Triangular bandage: Multipurpose for slings, bandaging, or as a makeshift dust mask (1-2)
- Antiseptic wipes: For cleaning wounds (10-15)
- Antibiotic ointment: For preventing infection in cuts and abrasions (1 small tube)
- Blister treatment: Moleskin, Compeed, or specialized blister bandages (1 sheet or pack)
- Butterfly closures or Steri-Strips: For closing deeper cuts (5-10)
- Tweezers: For removing splinters or ticks
- Small scissors: For cutting tape, gauze, or clothing in emergencies
- Safety pins: Multipurpose for bandages, clothing repairs, etc. (5-10)
Medications
Pain and Fever Relief
- Ibuprofen (e.g., Advil, Motrin): Anti-inflammatory for pain, fever, and inflammation; also helpful for altitude headaches
- Quantity: 20-30 tablets (200mg)
- Acetaminophen/Paracetamol (e.g., Tylenol): Alternative pain and fever reliever
- Quantity: 20 tablets (500mg)
- Aspirin: Dual purpose as pain reliever and emergency heart attack prevention
- Quantity: 10-15 tablets (325mg)
Gastrointestinal Issues
- Loperamide (e.g., Imodium): For controlling diarrhea
- Quantity: 10-15 tablets (2mg)
- Oral rehydration salts: Essential for replacing electrolytes lost through diarrhea or excessive sweating
- Quantity: 10-15 packets
- Bismuth subsalicylate (e.g., Pepto-Bismol): For indigestion, nausea, and mild diarrhea
- Quantity: 15-20 tablets
- Antacids: For heartburn and indigestion
- Quantity: 10-15 tablets
- Laxatives: Constipation is common at altitude and with dietary changes
- Quantity: 5-10 tablets
Respiratory and Allergies
- Antihistamines (e.g., Benadryl, Claritin): For allergic reactions and as a sleep aid
- Quantity: 10-15 tablets
- Decongestant: For nasal congestion from colds or allergies
- Quantity: 10 tablets
- Throat lozenges: For sore throats from dry air or colds
- Quantity: 15-20 lozenges
- Asthma inhaler: If you have asthma, bring your prescribed inhaler plus a spare
Antibiotics
Consult your doctor about obtaining prescription antibiotics for self-treatment of severe diarrhea or respiratory infections. Common options include:
- Azithromycin: For bacterial diarrhea and respiratory infections
- Quantity: One course (typically 3-6 tablets)
- Ciprofloxacin: Alternative for bacterial diarrhea
- Quantity: One course (typically 6-10 tablets)
- Amoxicillin or Augmentin: For sinus, ear, and respiratory infections
- Quantity: One course (typically 15-21 tablets)
Topical Medications
- Hydrocortisone cream (1%): For insect bites, rashes, and allergic skin reactions (1 small tube)
- Antifungal cream: For fungal infections like athlete’s foot, common in humid conditions (1 small tube)
- Antibiotic ointment: Already mentioned under wound care
- Aloe vera gel: For sunburn relief (optional)
Additional Medical Items
- Digital thermometer: Compact and battery-operated
- Blood pressure monitor: Optional but useful if you have hypertension or are taking altitude medications that can affect blood pressure
- Pulse oximeter: Measures blood oxygen saturation, helpful for monitoring acclimatization and detecting early signs of altitude sickness
- Emergency dental kit: For temporary treatment of lost fillings or toothaches
- Latex or nitrile gloves: For hygiene when treating wounds (2-3 pairs)
- CPR face shield: For emergency resuscitation
- Emergency space blanket: Lightweight thermal protection for emergencies
- Medical waste bag: For proper disposal of contaminated materials
- Medical reference card: With basic first aid instructions
- Personal medical information card: Listing allergies, conditions, medications, and emergency contacts
Prescription Medications
- Personal prescriptions: Bring sufficient quantities of any medications you take regularly, plus a few extra days’ supply in case of delays
- Written prescriptions: Carry copies using generic (not brand) names in case you need replacements
- Physician’s letter: For controlled substances or injectable medications, carry a letter from your doctor explaining their medical necessity
First Aid Kit Organization and Maintenance
- Waterproof container: Store your first aid supplies in a waterproof, clearly marked container or pouch
- Organization: Use small ziplock bags to group similar items and protect from moisture
- Accessibility: Keep the kit in an easily accessible part of your daypack
- Inventory list: Include a list of contents with expiration dates
- Knowledge: Basic first aid training is invaluable; consider taking a wilderness first aid course before your trek
- Regular checks: Check expiration dates and replace items as needed before your trek
Trek-Specific Medical Considerations
For Everest Base Camp:
- The higher popularity means more trekkers and guides with potential medical training
- Medical facilities are available in Kunde, Namche Bazaar, and Pheriche, though with limited capabilities
- Helicopter evacuation is more readily available due to established landing zones and protocols
For Manaslu Circuit:
- More remote with fewer medical resources along the route
- Helicopter evacuation is possible but more complicated due to the remote terrain
- The longer duration and more varied environments may require additional supplies
Emergency Procedures
- Know the symptoms of serious altitude illness: severe headache unrelieved by medication, confusion, ataxia (loss of coordination), vomiting, shortness of breath at rest
- Understand that descent is the definitive treatment for serious altitude illness—medications are temporary measures
- Familiarize yourself with evacuation procedures specific to your trek and insurance coverage
- Establish communication protocols with your guide and group members for medical emergencies
By carefully assembling a comprehensive first aid kit tailored to the specific challenges of high-altitude Himalayan trekking, you’ll be prepared to handle common medical issues and provide initial treatment for more serious conditions while arranging evacuation if necessary. Remember that prevention—through proper acclimatization, hygiene, and self-care—is always preferable to treatment.
Food and Water
Proper nutrition and hydration are fundamental to a successful Himalayan trek. The physical demands of hiking at high altitude require adequate caloric intake, while the risk of waterborne illnesses necessitates careful attention to water purification. While tea houses along both the Manaslu Circuit and Everest Base Camp treks provide meals, understanding your options and bringing appropriate supplements will enhance your trekking experience.
Water Considerations
Water Sources
Both treks offer various water sources:
- Tea houses: Most provide boiled water for purchase (typically 100-150 NPR per liter)
- Natural sources: Streams, rivers, and springs are abundant but require treatment
- Bottled water: Available at lower elevations but becomes increasingly expensive higher up and creates plastic waste issues
Water Purification Methods
Due to the risk of waterborne pathogens, all water from natural sources must be treated before consumption. Consider bringing at least two of these purification methods for redundancy:
1. Water Filters
Portable water filters remove bacteria, protozoa, and particulates but may not eliminate viruses.
- Pump filters: Traditional option with good flow rate but heavier and bulkier
- Gravity filters: Convenient for filtering larger quantities at camp
- Squeeze filters: Lightweight and compact, popular for trekking
- Straw-style filters: Emergency backup but less practical for daily use
- Bottle filters: Convenient all-in-one solution
Look for filters with a pore size of 0.2 microns or less for effective pathogen removal.
2. Chemical Purification
- Chlorine dioxide tablets or drops: Effective against bacteria, viruses, and some protozoa; minimal aftertaste
- Iodine tablets: Effective but leaves an aftertaste; not recommended for pregnant women or those with thyroid conditions
- Silver ion solutions: Lightweight option, often used in conjunction with filtration
Chemical treatments typically require 30 minutes to 4 hours to be effective, depending on water temperature and clarity.
3. UV Purification
- UV light pens: Quick and effective against most pathogens
- Advantages: No chemicals, no aftertaste, quick treatment time (typically 90 seconds per liter)
- Disadvantages: Requires batteries, less effective in cloudy water, no residual protection
4. Boiling
- The most reliable method for pathogen elimination
- Water should reach a rolling boil for at least 1 minute (3 minutes above 2,000m/6,500ft)
- Tea houses typically offer boiled water for purchase
Hydration Systems
- Water bottles: Durable plastic or metal bottles (1-2 liters total capacity)
- Hydration bladders: Convenient for drinking while walking but can freeze at high altitudes and are harder to monitor for volume
- Insulated bottles: Useful for keeping water from freezing at higher elevations and for carrying hot drinks on cold mornings
- Wide-mouth bottles: Easier to fill from streams and less likely to freeze at the opening
Hydration Best Practices
- Daily intake: Aim for 3-4 liters per day at altitude to aid acclimatization and prevent dehydration
- Electrolyte replacement: Add electrolyte tablets or powders to water, especially important during strenuous sections
- Morning hydration: Drink 0.5-1 liter before starting each day’s trek
- Regular sipping: Drink small amounts frequently rather than large quantities infrequently
- Monitoring hydration: Clear or light yellow urine indicates good hydration; dark yellow suggests you need to drink more
- Evening moderation: Reduce intake in the evening to minimize nighttime bathroom trips, but ensure adequate overall daily hydration
Food Considerations
Tea House Meals
Both treks offer tea house accommodations with meals available for purchase. Understanding the typical offerings helps you plan supplementary snacks:
Typical tea house menu items:
- Breakfast: Porridge, pancakes, eggs, toast, chapati, Tibetan bread
- Lunch and dinner: Dal bhat (rice, lentil soup, and vegetable curry), noodles, pasta, fried rice, momos (dumplings), soups
- Beverages: Tea, coffee, hot chocolate, soft drinks, and sometimes beer at lower elevations
Tea house food considerations:
- Menu options decrease as altitude increases
- Prices increase with elevation due to portering costs
- Protein options become more limited at higher elevations
- Most tea houses offer vegetarian options, but vegan or special diets can be challenging
- Fresh fruits and vegetables become scarce above certain elevations
Supplementary Food Items
Bringing supplementary food items ensures you have reliable energy sources and comfort foods throughout your trek:
Energy-dense trail snacks:
- Energy/protein bars: 1-2 per day of trekking
- Trail mix: Nuts, dried fruits, and chocolate provide quick energy and healthy fats
- Dried fruits: Lightweight source of natural sugars and fiber
- Jerky or biltong: Shelf-stable protein source
- Nut butters: Individual packets provide calorie-dense nutrition
- Electrolyte tablets/powders: Essential for replacing minerals lost through sweat
- Energy gels: Quick carbohydrate source for challenging sections
- Hard candies: For quick energy and soothing sore throats in dry mountain air
- Instant soups: Comforting and warming option with added electrolytes
Comfort food considerations:
- Favorite tea bags or coffee packets
- Small condiments like hot sauce or spice mixes to enhance tea house meals
- Chocolate or other treats for morale boosts
- Powdered drink mixes to flavor water and add variety
Special Dietary Requirements
If you have specific dietary requirements, advance planning is essential:
- Vegetarians: Will find adequate options at most tea houses
- Vegans: Will have more limited choices; bring supplementary protein sources
- Gluten-free: Bring gluten-free energy bars and snacks; rice is widely available, but cross-contamination is possible
- Food allergies: Bring translation cards explaining your allergies in Nepali; tea house kitchens are basic and cross-contamination is likely
Caloric Considerations
Trekking at altitude significantly increases caloric requirements:
- Daily expenditure: Expect to burn 3,000-5,000+ calories per day depending on your size, the day’s elevation gain, and pack weight
- Altitude effects: Appetite often decreases at higher elevations despite increased caloric needs
- Cold weather: Your body burns additional calories to maintain core temperature in cold conditions
Food Safety Practices
- Hand hygiene: Use hand sanitizer before all meals and snacks
- Fruit and vegetable safety: Eat only peeled fruits or cooked vegetables at higher elevations
- Meat consumption: Exercise caution with meat dishes above 3,500m (11,500ft) where refrigeration is limited
- Food storage: Keep snacks in sealed containers to prevent contamination and deter mice in tea houses
Trek-Specific Food and Water Considerations
For Everest Base Camp:
- More developed tea houses often offer wider menu selections
- Bakeries in Namche Bazaar and some other villages provide Western treats
- Bottled water is more readily available but at premium prices
- The higher tourist volume means more accommodation for special diets
For Manaslu Circuit:
- More basic tea house menus with fewer Western options
- Greater reliance on traditional Nepali dishes like dal bhat
- Fewer opportunities to purchase supplementary snacks along the route
- More remote water sources may require more thorough treatment
Sustainable Practices
- Minimize plastic waste: Use refillable water bottles and water purification rather than buying bottled water
- Pack out food wrappers: Carry all non-biodegradable waste back to Kathmandu for proper disposal
- Support local economies: Purchase snacks and meals from local tea houses rather than relying entirely on imported foods
By carefully planning your food and water strategy, you’ll maintain the energy and hydration necessary to fully enjoy the magnificent landscapes and cultural experiences of your Himalayan trek while minimizing the risk of foodborne or waterborne illnesses that could derail your adventure.
Miscellaneous Items
Beyond the major categories of gear and equipment, several miscellaneous items can significantly enhance your trekking experience in the Himalayas. These items address specific challenges of the mountain environment, provide additional comfort and convenience, or serve as backup solutions for unexpected situations.
Trekking Poles
Trekking poles are among the most valuable accessories for Himalayan treks, providing numerous benefits:
- Reduced impact on knees and joints: Particularly important during long descents
- Improved balance and stability: Critical on uneven terrain, river crossings, and slippery surfaces
- Enhanced rhythm and endurance: Engaging upper body muscles distributes effort more evenly
- Versatility: Can serve as impromptu tent poles, camera mounts, or support for clothing when drying
Recommended specifications:
- Adjustable length: Allows customization for ascents (shorter) and descents (longer)
- Collapsible design: For easy attachment to backpack when not in use
- Shock absorption: Optional feature that reduces impact but adds weight
- Comfortable grips: Cork or foam handles prevent blisters and insulate in cold conditions
- Durable tips: Carbide tips provide traction on various surfaces
- Baskets: Small baskets for general use; consider bringing larger snow baskets if trekking in early spring or late autumn when snow is possible
Usage tips:
- Adjust to proper height (elbow at 90-degree angle when pole tip touches ground)
- Use wrist straps correctly to maximize support and prevent dropping
- Consider using one pole if you prefer having a hand free for photography or balance
Gaiters
Gaiters provide protection for your lower legs and help keep debris out of your boots. They’re particularly useful in these conditions:
- Early season treks with snow crossings
- Muddy trails during or after rainfall
- Sections with loose scree or gravel
- Areas with thorny vegetation at lower elevations
Recommended specifications:
- Height: Mid-calf gaiters are sufficient for most conditions
- Material: Durable, water-resistant fabric with reinforced lower sections
- Closure system: Secure front closure with additional top and bottom fastening
- Compatibility: Ensure they fit over your specific hiking boots
Repair Kit
A basic repair kit allows you to address equipment failures that might otherwise impact your trek:
- Multi-tool or pocket knife: With pliers, scissors, and various blades
- Duct tape: Wrapped around trekking poles or water bottles to save space
- Gear repair tape: For patching tears in waterproof gear or sleeping bags
- Sewing kit: Needles, various threads, safety pins, and spare buttons
- Cord or lightweight rope: 3-5 meters of paracord has countless uses
- Zip ties: Various sizes for quick fixes
- Spare parts: Boot laces, backpack buckles, sleeping pad valve, etc.
Navigation Tools
While both treks follow established routes and typically include guides, basic navigation tools provide security and enhance your understanding of the journey:
- Physical maps: Detailed topographic maps of your route
- Compass: Basic orienteering compass with declination adjustment
- Altimeter: Either as a dedicated device or as part of a watch/GPS
- Guidebook: With route descriptions and points of interest
- Downloaded offline maps: Apps like Maps.me or Gaia GPS with pre-downloaded route information
Personal Comfort Items
Small items that significantly enhance comfort during your trek:
- Bandana or buff: Multifunctional item for sun protection, dust filtering, neck warming, etc.
- Earplugs and eye mask: Essential for light sleepers in shared tea house rooms
- Inflatable pillow or pillowcase: To stuff with clothes for better sleep
- Hand and foot warmers: Disposable or reusable warmers for extremely cold conditions
- Wet wipes: For personal hygiene when shower facilities are unavailable
- Trekking umbrella: Provides sun and rain protection; increasingly popular alternative to rain jackets at lower elevations
Environmental Protection
Items to minimize your environmental impact:
- Trash bags: Dedicated bags for carrying out all non-biodegradable waste
- Toilet kit: Trowel, toilet paper, hand sanitizer, and ziplock bags for used paper in areas without facilities
- Reusable containers: Collapsible containers for leftovers or takeaway meals
- Menstrual products: Reusable options like menstrual cups reduce waste; if using disposables, bring ziplock bags to pack them out
Communication and Safety
- Whistle: For emergency signaling
- Emergency contact card: With local emergency numbers, embassy contacts, and insurance details
- Satellite communicator: Optional devices like Garmin InReach or SPOT for emergency communication in areas without cell coverage
- Local SIM card: Purchased in Kathmandu for cell service where available
- Language cards: Basic Nepali phrases for communication
Comfort and Entertainment
- Playing cards or small games: For entertainment during rest days or evenings
- Journal and pen: For recording your experiences
- Kindle or e-reader: Loaded with books for downtime
- Binoculars: Compact pair for wildlife viewing and distant landscape appreciation
- Trekking seat pad: Small foam or inflatable pad for comfortable rest breaks
Practical Accessories
- Stuff sacks and compression bags: For organizing gear and maximizing space
- Ziplock bags: Various sizes for organization, waterproofing, and waste management
- Carabiners: For attaching items to your backpack
- Clothesline and travel clothespins: For drying hand-washed items
- Spare batteries: For headlamp and other devices
- Watch with alarm: For early morning starts, especially for sunrise viewpoints or pass crossings
Trek-Specific Considerations
For Everest Base Camp:
- The higher altitude and colder conditions may require additional warm accessories like liner gloves or a balaclava
- The more established route means repair services might be available in larger settlements like Namche Bazaar
- Solar chargers are more effective due to generally clearer weather and established charging points at tea houses
For Manaslu Circuit:
- The more remote nature means self-sufficiency is more important; bring a more comprehensive repair kit
- The varied terrain from subtropical to alpine environments requires more adaptable accessories
- Cultural considerations are important in traditional villages; items like a lightweight sarong can be useful for bathing or temple visits
Weight and Priority Considerations
When deciding which miscellaneous items to include, consider:
- Multipurpose potential: Prioritize items that serve multiple functions
- Weight-to-benefit ratio: Assess whether the item’s usefulness justifies its weight
- Likelihood of use: Consider how frequently you’ll actually use each item
- Availability on the route: Some items can be purchased if needed rather than carried throughout
- Group sharing: Coordinate with trekking companions to share certain items rather than duplicating
By thoughtfully selecting miscellaneous items that address specific needs and enhance your experience without unnecessarily adding weight, you’ll be better prepared for the varied challenges and opportunities that arise during your Himalayan adventure.
Packing Tips and Strategies
Effective packing is as important as having the right gear. How you organize and distribute your equipment can significantly impact your comfort, efficiency, and overall trekking experience in the Himalayas. This section provides strategies for weight management, organization, seasonal adaptations, and practical packing techniques for both the Manaslu Circuit and Everest Base Camp treks.
Weight Considerations
The physical demands of high-altitude trekking make weight management a critical consideration. While porters or yaks typically carry your main bag on tea house treks, you’ll still need to manage the weight of your daypack, and there are often weight limits for porter loads.
Weight management strategies:
- Weigh everything: Use a digital scale to weigh individual items before packing
- Set strict limits: Aim for a main bag under 12-15kg (26-33lbs) and a daypack under 4-5kg (9-11lbs) excluding water
- Identify luxury vs. necessity: Distinguish between essential items and comfort additions
- Choose multipurpose items: Prioritize gear that serves multiple functions
- Coordinate with trekking partners: Share items like first aid supplies, repair kits, and guidebooks
- Consider the porter: Remember that someone else will be carrying your main bag, often over challenging terrain and at high altitude
Weight distribution principles:
- In your main bag:
- Heavier items centered and close to your back
- Items needed at the same time packed together
- Daily essentials accessible without unpacking everything
- In your daypack:
- Heaviest items close to your back and centered between shoulder blades
- Frequently accessed items in top pockets or side pouches
- Even distribution from left to right for balance
- Emergency items (first aid, rain gear) always accessible
Organization Techniques
Proper organization saves time, reduces stress, and helps protect your gear from the elements.
Packing organizers:
- Compression sacks: Reduce the volume of clothing and sleeping bags; color-coded for easy identification
- Packing cubes: Keep similar items together and maintain organization throughout your trek
- Dry bags: Protect electronics, documents, and clothing from moisture; come in various sizes and colors
- Ziplock bags: Inexpensive, lightweight organization for smaller items and added waterproofing
- Stuff sacks with air purge valves: Maximize space efficiency for bulky items like down jackets
Organization systems:
- Category system: Group similar items together (all clothing, all electronics, etc.)
- Frequency system: Organize by how often you’ll need access (daily, occasional, emergency)
- Layer system: Pack in reverse order of need, with least-needed items at the bottom
- Color-coding: Use different colored bags for different categories of gear
Daily organization routine:
- Prepare the next day’s accessible clothing and essentials each evening
- Maintain consistent locations for important items like headlamp, water purification, and first aid kit
- Keep a small essentials bag that transfers between main bag and daypack with critical items
What to Leave Behind
Identifying unnecessary items is as important as knowing what to bring:
- Eliminate redundancies: Choose either a fleece or a lightweight down jacket, not both
- Minimize cotton clothing: It retains moisture and dries slowly
- Limit “just in case” items: Be realistic about what emergencies you’re actually preparing for
- Reduce toiletries: Decant into smaller containers or choose solid alternatives
- Minimize electronics: Consider whether each device is truly necessary
- Limit casual clothing: You’ll be in trekking clothes most of the time; one set of tea house clothes is sufficient
Common unnecessary items:
- Multiple heavy books (use e-readers or one small guidebook)
- Full-sized toiletries
- Excessive changes of clothing
- Heavy duty hiking boots (unless you have specific ankle support needs)
- Multiple camera lenses (unless photography is a primary focus)
- Formal or cotton clothing
Packing for Different Seasons
Both the Manaslu Circuit and Everest Base Camp treks are typically done during the spring (March-May) and autumn (September-November) seasons, but conditions vary significantly within these periods.
Spring (March-May):
- Early spring (March): Pack for winter conditions at higher elevations with potential snow
- Mid-spring (April): Balanced packing with layers for variable conditions
- Late spring (May): Prepare for warmer days but still cold nights; include rain protection as monsoon approaches
Autumn (September-November):
- Early autumn (September): Include good rain gear as monsoon may linger; warmer sleeping bag for higher elevations
- Mid-autumn (October): The most stable weather; standard packing list applies
- Late autumn (November): Increasingly cold conditions, especially at night; pack additional warm layers
Seasonal adjustments:
- Sleeping bag: Adjust temperature rating based on season (colder for early spring/late autumn)
- Gloves: Heavier gloves for colder seasons, lighter options for warmer periods
- Rain gear: More substantial for early autumn, lighter for mid-autumn
- Base layers: More options for colder seasons, fewer for warmer periods
- Footwear: Consider waterproof gaiters for early spring snow or early autumn rain
Practical Packing Process
A methodical approach to packing ensures nothing is forgotten and everything is properly protected:
Before packing:
- Create a comprehensive checklist categorized by type of item
- Lay out all gear and cross-reference with your list
- Eliminate any non-essential items
- Ensure all electronics are fully charged
- Pre-treat clothing with DWR spray if needed
Packing sequence:
- Line main bag with a garbage bag or pack liner for waterproofing
- Pack sleeping bag at the bottom in its compression sack
- Add heavier, less frequently used items
- Place clothing in the middle layers
- Keep frequently used items and toiletries at the top or in external pockets
- Attach bulky items like trekking poles to the outside if necessary
Final checks:
- Verify all zippers and closures are secure
- Attach rain cover
- Test the weight and comfort of both bags
- Ensure critical items (passport, money, medications) are accessible but secure
Tea House Trekking Specific Strategies
Both the Manaslu Circuit and Everest Base Camp are tea house treks, which allows for some specific packing strategies:
- Evening comfort kit: Create a small bag with clean socks, base layers, and toiletries that you can quickly access upon reaching your tea house
- Sleep system: Since you’ll have a bed each night, focus on items that enhance comfort on basic mattresses rather than full camping gear
- Dirty laundry management: Bring a dedicated dirty clothes bag with odor control features
- Room sharing considerations: Include earplugs and eye mask as you’ll likely share rooms with other trekkers
- Tea house etiquette kit: Lightweight slippers or sandals for indoor use, modest clothing for common areas
Trek-Specific Packing Considerations
For Everest Base Camp:
- Lukla flight restrictions: Be aware of the strict weight limits on flights to Lukla (typically 10-15kg for checked bags and 5kg for carry-on)
- More consistent climate zones: Less variation in environments means more focused packing
- Better infrastructure: More opportunities to purchase forgotten items or do laundry in places like Namche Bazaar
For Manaslu Circuit:
- Greater elevation and climate variation: Pack for a wider range of conditions
- More remote villages: Include more self-sufficient options as purchasing opportunities are limited
- Cultural considerations: Pack more conservative clothing options for traditional villages
- Longer duration: Account for potentially more days between laundry opportunities
Final Packing Wisdom
- Test everything before your trek: Use all gear on training hikes to identify issues
- Break in boots: Wear hiking boots for at least 30-50 miles before your trek
- Practice with your backpack: Load it with similar weights and adjust for comfort
- Create redundancy for critical items: Have backup methods for water purification, light sources, and navigation
- Prepare for varying conditions: The Himalayas can present summer and winter conditions in the same day
- Remember less is more: Every unnecessary item becomes a burden at high altitude
- Leave room for souvenirs: Consider that you might want to purchase local crafts or mementos
By applying these packing strategies, you’ll be well-prepared for the physical challenges and variable conditions of Himalayan trekking while maintaining comfort and safety throughout your journey. Effective packing not only lightens your physical load but also reduces mental stress, allowing you to fully immerse yourself in the magnificent landscapes and cultural experiences that make these treks so rewarding.
Conclusion
Trekking in the Himalayas represents one of life’s great adventures—an opportunity to challenge yourself physically and mentally while experiencing some of the most spectacular landscapes and rich cultural traditions our planet has to offer. Whether you choose the iconic journey to Everest Base Camp or the less-traveled but equally rewarding Manaslu Circuit, proper preparation and packing are fundamental to transforming these challenges into lasting, positive memories.
Final Checklist
As you prepare for your Himalayan adventure, this comprehensive final checklist will help ensure you haven’t overlooked any essential items:
Documentation and Finances: - [ ] Passport (valid for at least 6 months beyond your trip) - [ ] Nepal visa or visa application materials - [ ] Trekking permits (or materials to obtain them) - [ ] Travel insurance documentation (with high-altitude coverage) - [ ] Emergency contact information - [ ] Sufficient cash in Nepali Rupees - [ ] Credit/debit cards for emergencies - [ ] Money belt or secure storage solution
Clothing System: - [ ] Moisture-wicking base layers (tops and bottoms) - [ ] Insulating mid layers (fleece or down) - [ ] Waterproof/breathable outer layers (jacket and pants) - [ ] Trekking pants (convertible options for variable conditions) - [ ] Trekking shirts (short and long sleeve) - [ ] Underwear and sports bras (quick-dry, antimicrobial) - [ ] Trekking socks (multiple pairs) - [ ] Warm hat and sun hat - [ ] Gloves (liner and insulated waterproof) - [ ] Buff or neck gaiter - [ ] Gaiters (for snow or muddy conditions) - [ ] Comfortable clothes for tea houses
Footwear: - [ ] Broken-in waterproof hiking boots with ankle support - [ ] Camp shoes or sandals for tea houses - [ ] Liner socks (optional for blister prevention)
Sleeping Equipment: - [ ] Sleeping bag (rated appropriately for season) - [ ] Sleeping bag liner - [ ] Travel pillow or pillowcase (optional)
Packs and Bags: - [ ] Main backpack or duffel bag (60-80L) - [ ] Daypack (25-35L) - [ ] Rain covers for both bags - [ ] Packing cubes or stuff sacks for organization - [ ] Dry bags for electronics and important items - [ ] Plastic bags for waterproofing and organization
Hydration and Nutrition: - [ ] Water bottles or hydration system (2-3L capacity) - [ ] Water purification system (filter, tablets, or UV) - [ ] Electrolyte tablets or powders - [ ] Energy bars, trail mix, and supplementary snacks - [ ] Favorite tea bags or coffee packets (optional)
First Aid and Medications: - [ ] Personal prescription medications - [ ] Altitude sickness medication (Diamox/acetazolamide) - [ ] Pain relievers (ibuprofen, acetaminophen) - [ ] Antihistamines - [ ] Anti-diarrheal medication - [ ] Broad-spectrum antibiotics (prescription) - [ ] Bandages, gauze, and wound cleaning supplies - [ ] Blister treatment supplies - [ ] Rehydration salts - [ ] Antiseptic wipes or solution - [ ] Medical tape and scissors - [ ] Thermometer - [ ] Tweezers - [ ] Insect repellent (for lower elevations)
Toiletries: - [ ] Biodegradable soap - [ ] Shampoo/conditioner (small amounts) - [ ] Toothbrush and toothpaste - [ ] Deodorant - [ ] Sunscreen (SPF 50+) - [ ] Lip balm with SPF - [ ] Hand sanitizer - [ ] Quick-dry towel - [ ] Toilet paper - [ ] Wet wipes - [ ] Feminine hygiene products if needed - [ ] Nail clippers - [ ] Mirror (small)
Electronics: - [ ] Headlamp with extra batteries - [ ] Camera with extra batteries and memory cards - [ ] Mobile phone - [ ] Power bank - [ ] Adapters for Nepali outlets (Type C, D, or M) - [ ] Charging cables - [ ] Watch with alarm function
Navigation and Communication: - [ ] Map of trekking route - [ ] Guidebook or route description - [ ] Compass - [ ] Whistle - [ ] Local SIM card or international roaming plan
Miscellaneous Essentials: - [ ] Trekking poles - [ ] Sunglasses with 100% UV protection - [ ] Repair kit with multi-tool - [ ] Duct tape - [ ] Zip ties - [ ] Spare bootlaces - [ ] Sewing kit - [ ] Notebook and pen - [ ] Reading material or games for evenings - [ ] Earplugs and eye mask - [ ] Lightweight clothesline - [ ] Carabiners - [ ] Stuff sacks and compression bags
Additional Resources
To further enhance your preparation for trekking in the Himalayas, consider exploring these additional resources:
Books and Guides: - “Trekking in the Nepal Himalaya” (Lonely Planet) - “Altitude Illness: Prevention & Treatment” by Stephen Bezruchka - “Nepal Trekking & the Great Himalaya Trail” by Robin Boustead
Online Resources: - Nepal Tourism Board (www.welcomenepal.com) - Himalayan Rescue Association (www.himalayanrescue.org) - Trail-specific forums and communities
Training Resources: - Consult with a fitness professional about altitude-specific training - Consider a wilderness first aid course before your trek - Practice with your gear on progressively challenging hikes
Local Support: - Research reputable trekking agencies with experienced guides - Connect with recent trekkers through online forums for current conditions - Consider hiring a local guide even if trekking independently, particularly for the Manaslu Circuit which requires guided trekking
Final Thoughts
The Himalayas have captivated the human imagination for centuries, drawing pilgrims, adventurers, mountaineers, and trekkers to experience their grandeur firsthand. Your journey to Manaslu or Everest Base Camp represents your own chapter in this continuing story of human exploration and connection with these magnificent mountains.
While proper gear and preparation are essential, remember that the most important elements of a successful trek are often intangible: a positive attitude, cultural respect, environmental consciousness, and openness to the unexpected experiences that inevitably arise in mountain environments. The challenges you’ll face—whether physical exertion, basic accommodations, or altitude adjustment—are integral parts of the journey that make the achievement all the more meaningful.
As you make your final preparations, pack not just the equipment listed in this guide but also patience, flexibility, and humility. The Himalayas have much to teach those who approach them with respect and openness. Your trek will likely challenge you in unexpected ways while rewarding you with experiences and perspectives that remain with you long after you’ve returned home.
Safe Travels and Namaste!